Quick post here to get the recipe down permanently while I remember it. Unfortunately, lapses in posting something right away means that any notes I might have had for a recipe and changes I made are easily forgotten which is why some haven't made it onto the blog. It's been a long long while since I've posted, partly due to laziness and partly due to lack of time. In general, the way I eat has also changed in the past few years and I've just been cooking super simply. Anytime I do make something that requires a recipe, I haven't had time to retest it if it needs improvement or perhaps it's not good enough to remake or I just add it to the evergrowing to-post list of recipes. I think moving forward, I'm going to continue to let this be a journal of recipes that I want to add to my collection. I won't worry if I have a good pic or a pic at all, not that I've ever really been concerned about that. This blog was created mainly as my online recipe collection that would help document things I've made that I can come back to time and time again and serve as a resource for others who might want to make the same things. In the last few years, although I haven't posted much, I'm happy to say that I have found myself coming back to recipes here since I know they just work and I can rely on them. There are so many other blogs there for inspiration and entertainment that I'm fine with how this blog is serving me for now.
Hopefully, for those of you who've tried my recipes, you'll trust that I only post recipes that I myself would remake and have found to work and if you like, you'll give them a try as well. Adapted from my turmeric cumin rice, this is a very easy version of Mexican Red Rice using tomato paste. I've kept it super simple here, but this would also be great with the addition of chili powder, cumin, or garlic powder added when cooking, or cilantro mixed in at the end. It's great served as a side, added to burritos, or just eaten on its own. Enjoy!
Mexican Red Rice
2 tbsp butter or oil
1 3/4 cups long grain rice
2 1/2 tbsp tomato paste
1/2 tsp oregano
2 1/2 cups chicken broth
salt and pepper to taste
Melt the butter in a medium saucepan over medium heat, add the rice and let toast for about 4 minutes until just starting to turn golden brown. Add the tomato paste and oregano and stir until well combined with the rice. Add the broth, salt and pepper to taste, at least two large pinches, and bring to a boil over high heat uncovered. Once boiling, reduce the heat to simmer and cover, letting it cook for 15 min without peeking. Turn off the heat and let it sit for another 15 min to absorb any remaining water. Taste and add addtional salt and pepper if necessary.
Saturday, March 10, 2018
Saturday, December 20, 2014
Pumpkin Mousse Cheesecake


I was more than pleased with this recipe from Brad Farmerie. Not only is it delicious, it's also super simple to put together, much simpler and quicker than an actual pie or cheesecake. It's also very impressive looking and can be done ahead of time. Instead of graham cracker crumbs, I used speculoos cookie crumbs and really loved the spice that it added. You can really use any crisp cookies you like.
I also modified the pumpkin mousse part, using whipped cream instead of whipped egg whites since I didn't really want raw eggs in it, but do what you like. I've made Ina Garten's pumpkin mousse in the past with great success, so I based this pumpkin mousse off of that one. I'll have to add that recipe here when I get a chance. Anyway, I really recommend giving these bars a try if you'd like a pumpkin dessert but not necessarily a pumpkin pie, you'll be glad you did.
Pumpkin Mousse Cheesecake
Recipe adapted from Brad Farmerie
Makes one 9 x 13 inch pan
Crust
2 cups cookie crumbs (graham crackers, speculoos, gingersnaps, etc.)
1 stick (1/2 cup) melted unsalted butter
Preheat oven to 350 deg F. Butter a 9x 13 inch baking dish. Combine the cookie crumbs and the melted butter. Press into the prepared baking dish and set aside while you prepare the cheesecake layer.
Cheesecake
1 8 oz package of cream cheese, room temp
2 large eggs
3/4 cup granulated sugar
pinch of salt
1/2 tsp pure vanilla extract
In a standing mixer fitted with the whisk attachment or with a handheld mixer and a medium bowl, whisk the cream cheese, salt, and sugar together until light and fluffy. Add the eggs and vanilla, mixing until well incorporated. Spread the cheesecake mixture over the crust and bake for 20 min. Let cool completely.
Pumpkin Mousse
1 1/4 oz envelope of powdered gelatin
1/4 cup water
1 15 oz can pure pumpkin puree
3 large egg yolks
1/2 cup granulated sugar
1/2 cup milk
1/2 tsp coarse salt
2 tsp ground cinnamon
1/2 cup heavy cream
Fill a small bowl with the water and sprinkle the gelatin over the top. Let sit for 5 minutes to soften.
In a large heatproof bowl set over a pot of simmering water, mix the pumpkin puree, milk, sugar, egg yolks, salt, and cinnamon together for 10-12 min until it thickens and reaches about 158 deg F. Off the heat, add the softened gelatin and mix until combined. Let the mixture cool to room temp.
Once the pumpkin mixture is cool, whisk the heavy cream in a standing mixer fitted with a whisk attachment or by hand until it reaches soft peaks. Fold the whipped cream into the pumpkin mixture. Spread the pumpkin mousse over the cooled cheesecake and refrigerate at least 8 hrs, preferably overnight.
Serve from the fridge with additional lightly sweetened whipped cream if desired. Cheesecake will last wrapped in the fridge up to a few days.

Saturday, December 13, 2014
Pumpkin Whoopie Pies
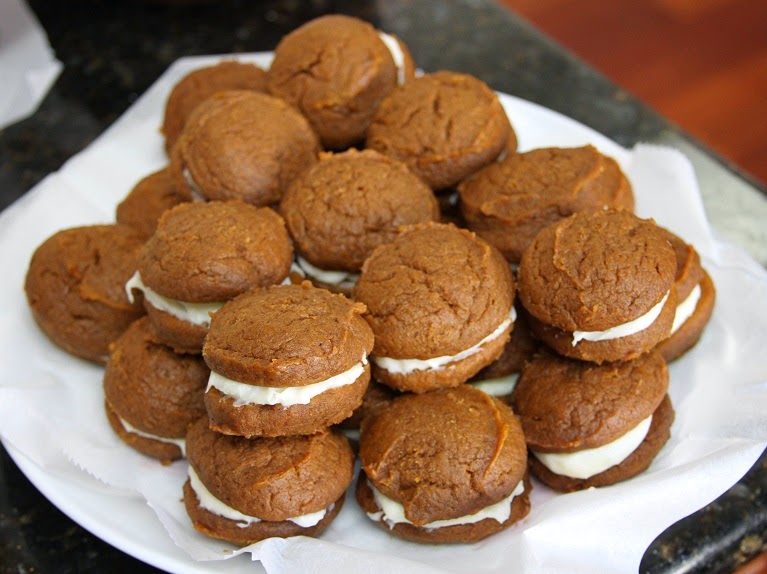


Pumpkin Whoopie Pies
Recipe adapted from Matt Lewis of Baked
Makes about 2 dozen whoopie pies
Whoopie cookies
3 cups all purpose flour
1 tsp coarse salt, half the amount of fine salt
1 tsp baking powder
1 tsp baking soda
2 tbsp. ground cinnamon
1 tbsp. ground ginger
1/3 tbsp. ground cloves
2 cups firmly packed dark brown sugar
1 cup vegetable oil
3 cups pumpkin puree, chilled
2 large eggs
1 tsp pure vanilla extract
Preheat oven to 350 deg F. Prepare about 3 baking sheets with silpats or parchment paper.
Sift the flour, salt, baking powder, baking soda, and the spices together in a medium bowl. Set aside. In a large bowl, whisk together the brown sugar and oil until well combined. Mix in the pumpkin puree, then the eggs and vanilla, whisking until well combined.
Gradually, fold in the flour mixture until incorporated. With a small tbsp. sized ice cream scoop, scoop mounds of dough onto your prepared baking sheets, spacing them about an inch apart, and place them in the oven. Bake for 15-18 min, depending on the size of your cookies until a cake tester inserted in the center comes out clean. Rotate them halfway through for even baking. Bake the cookies in batches if necessary.
Let the cookies cool completely on the pan before filling.
Cream cheese filling
1 1/3 cups powdered sugar
5 oz cream cheese, room temp
5 tbsp. unsalted butter, room temp
pinch of salt
1 tsp pure vanilla extract
Sift the powdered sugar and set aside. In a standing mixer fitted with a paddle attachment, with a hand mixer, or wooden spoon, beat the butter for 1-2 minutes until smooth. Then add the cream cheese and beat for another 1-2 min until well incorporated. Add the sifted powdered sugar, vanilla, and salt and mix until combined. Filling may be made a day ahead.
To fill the whoopie cookies, use an ice cream scoop, spoon, or a piping bag to frost the bottom of one whoopie cookie. Then top with another and press together gently. Store in the fridge, covered, for at least 30 min before serving. Whoopie pies will last in the fridge for up to several days or in the freezer for longer.

Saturday, December 6, 2014
Simply Mindblowing Coconut Maple Granola
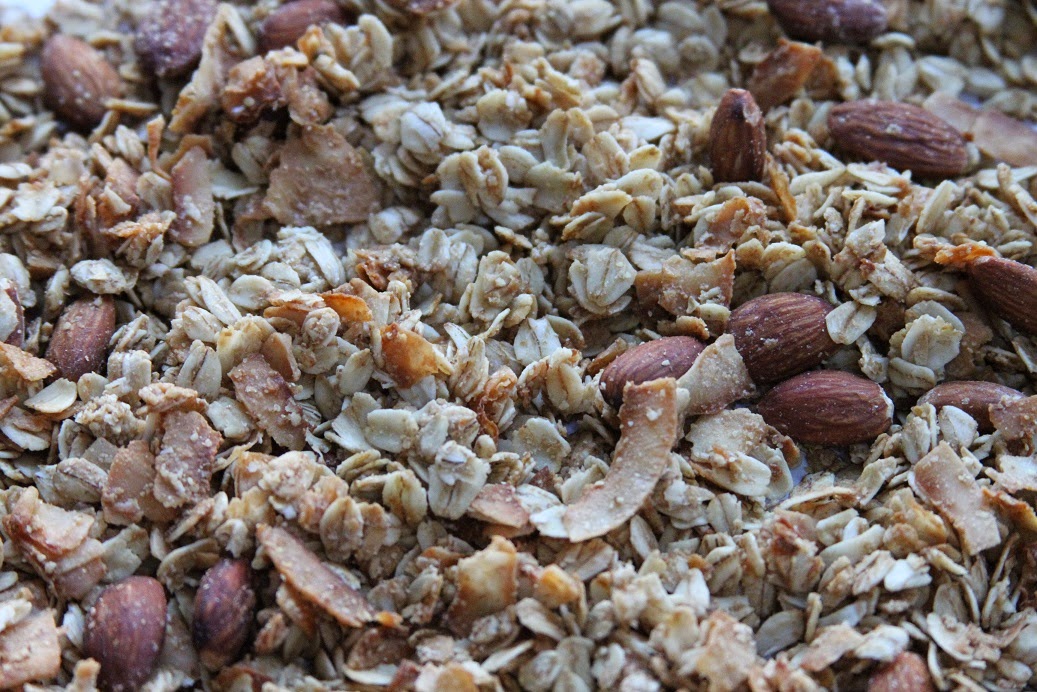


Coconut Maple Granola
Adapted from Shutterbean
Makes about 6 cups
3 cups rolled oats, not quick-cooking
3/4 cup unsweetened flaked coconut
3/4 cup raw almonds, or mix in roasted almonds at the end
4 tbsp flaxseed meal
1/3 cup melted coconut oil
1/4 cup maple syrup
1/8 cup brown sugar, lightly packed
1/4 tsp fine salt
Preheat the oven to 350 deg F. In a large bowl, combine the oats, coconut, almonds, flaxseed meal, brown sugar, and salt.
Add in the melted coconut oil and maple syrup and stir well to combine. When everything has been mixed thoroughly, pour the mixture onto a lined baking sheet. Bake for 25-30 min, stirring every 10-15 min until the granola is lightly golden brown.
Let the granola cool completely before storing in an airtight container. It will last for up to several weeks at room temp.
Saturday, November 29, 2014
Carrot Banana Bread


Carrot Banana Bread
Recipe adapted from Mel's Kitchen Cafe
Makes One 9x5 inch loaf
2 cups all purpose flour (8.5 ounces)
1 tsp baking soda
1/4 tsp salt
1 tsp ground cinnamon
1/2 tsp ground nutmeg
1 cup mashed bananas, 3 very ripe medium bananas or 2 large
3/4 cup lightly packed brown sugar
1/2 cup melted coconut oil
1/4 cup unsweetened applesauce
2 large eggs
1 tsp pure vanilla extract
1 cup finely grated carrots
Preheat the oven to 350 deg F. Line a 9 x 5 inch loaf pan with parchment or lightly grease.
In a medium bowl, sift together the flour, baking soda, salt, cinnamon, and nutmeg. Set aside.
In a large bowl, whisk together the mashed bananas, brown sugar, coconut oil, applesauce, eggs, and vanilla extract until well combined. Add in the grated carrots. Fold in the flour mixture with a spatula until just combined. Scrape the batter into the prepared loaf pan and bake for 50-60 minutes until a cake tester inserted in the center comes out clean.
Let the bread cool in the pan for 10 minutes before removing to a wire rack to cool completely. Banana bread will last, well wrapped, at room temp for several days or for several weeks in the freezer.

Saturday, November 22, 2014
Mrs. Sigg's Snickerdoodles

This is another one requested by my youngest sister, so don't expect any healthy substitutions for this one. For a while, she's been wanting me to make some snickerdoodles. So, as I usually do, I decided to try a different recipe. I already have a snickerdoodle recipe from Joanne Chang posted on this blog that is very good, but it is a rather crisp snickerdoodle. For a bit more chewiness, I decided to go with a popular recipe on Allrecipes that included some vegetable shortening. Based on the popular snickerdoodle recipes I've seen across the web, they're all pretty much the same recipe with just slightly different proportions.
The texture of this one was spot on, but using some shortening instead of butter does result in a less flavorful cookie, so it's up to you which one you pick. I made little mini snickerdoodles since that's what my sister requested and while that's good for portion control, it can also be dangerous since they're so easy to eat in one bite that you might start to lose count once you taste one. Don't say I didn't warn you.

Mrs. Sigg's Snickerdoodles
Recipe from Young Idealistic Baker who adapted from Allrecipes
Makes about 3-4 dozen mini cookies
1/4 cup unsalted butter, softened at room temp
1/4 cup vegetable shortening
3/4 cup granulated sugar
1 large egg
1 tsp pure vanilla extract
1 1/3 cups all purpose flour
1 tsp cream of tartar
1/2 tsp baking soda
1/8 tsp salt
2 tbsp granulated sugar
2 tsp ground cinnamon
Preheat the oven to 400 deg F and line two baking sheets with parchment paper. Sift the flour, cream of tartar, baking soda, and salt together in a medium bowl. Set aside. Combine the 2 tbsp of sugar and cinnamon in a small bowl and set aside.
In a stand mixer with a paddle attachment, with a handheld mixer, or with a wooden spoon, cream the butter, shortening, and 3/4 cup sugar together for 3-5 min until light and fluffy. Add in the egg and vanilla and mix until well incorporated.
Add the flour mixture and mix until just combined. With a small ice cream scoop about the size of a tsp or with your hands, form small balls of dough. Roll the balls of dough in the cinnamon sugar and place on the baking sheet leaving about 2 inches between them. Bake for 7-8 minutes, preferably on the middle rack.
Let the cookies cool for about a minute on the baking sheet so they can set up a bit. Then, remove to a cooling rack to cool completely. Store the cookies in an airtight container for up to several days at room temp.
 |
| Obligatory stacked cookie shots, also just cause I love them. |

Subscribe to:
Posts (Atom)