A few months ago, I heard about the blog The Zero Waste Home. The author, Bea, discusses how she and her family live a waste free lifestyle. Though their life is simplified, it is no less fulfilling. They place value in experiences and memories as opposed to material objects. Compared to simply aiming to lead an ecofriendly lifestyle, many might say that they've taken it to the extreme, but isn't this how we all used to live for many years before the arrival of manufacturing and modern conveniences?
While this type of lifestyle may not work for everyone, i do think we can all stand to minimize clutter in our lives and reevaluate the choices we make as consumers.
There are many benefits that go along with a simpler lifestyle such as healthier homecooked food, less exposure to toxins commonly found in household products, and reduced living costs.
I'm still a long way from reaching where i want to be in terms of decluttering my life, but Bea's blog has certainly inspired me and made me think. Even if you don't agree with everything on the blog, check it out and decide for yourself.
Friday, June 10, 2011
Wednesday, June 1, 2011
Easy Tapioca Pudding and Chiffon Cake

The recipe can easily be scaled up or down although it will take a bit longer to cook. I just use whatever kind of milk i have around although whole milk does produce a richer end product. I've found that about a third a cup of sugar is plenty for my palate, especially since my family tends to like things less sweet.
I've also made a green tea version of this pudding by simply adding a few teaspoons of matcha green tea powder(enough to produce a nice green color)and steeping a few green tea bags in the milk as it's heating up. I adjusted according to taste until I thought the flavor was strong enough.
Note: add the matcha powder towards the end to avoid discoloration as it cooks
This will definitely be a favorite in my repertoire for many years to come and i'm thinking about trying a coffee version next. I also recently made a strawberry crisp with a honey mascarpone cream adapted from this recipe and it has become my favorite crisp recipe, slightly nudging ahead of Ina Garten's apple and pear crisp.
Tapioca Pudding
Adapted from Chocolate and Zucchini
 4 cups milk (I prefer whole milk, but whatever you have)
1/2 a large vanilla bean
1/2 cup + 1 tablespoon small pearl tapioca
1/3 cup granulated sugar
1/4 teaspoon salt
Pour the milk into a heavy bottomed medium saucepan. Split the vanilla bean and scrape the seeds, add the bean and seeds to the milk.
Bring milk to a simmer over medium heat. Sprinkle the tapioca into the milk and stir with a heatproof spatula or wooden spoon.
Cook, at a simmer for 15 minutes stirring occasionally. Taste for doneness, should be tender and translucent, but still have some resistance.
Remove from the heat, add the sugar and salt, and stir to dissolve. The mixture will still be quite thin, but will firm up nicely after cooling. You can add more or less tapioca based on your preferences. Transfer to a serving bowl or container and let cool completely.
Tapioca can be made a day ahead, and keeps for a few days in an airtight container in the fridge.
For the green tea version: Steep several green tea bags in the simmering milk, towards the end, add several teaspoons of matcha powder. Skip the vanilla bean, you may add half a teaspoon of vanilla extract if you like.
For a coconut version: use 2 1/4 cups of milk and one can of coconut milk.
For a coffee version: stir in 1-2 tsp of instant coffee granules at the end, depending on your taste. Add more sugar if necessary.
 |
| coffee tapioca |
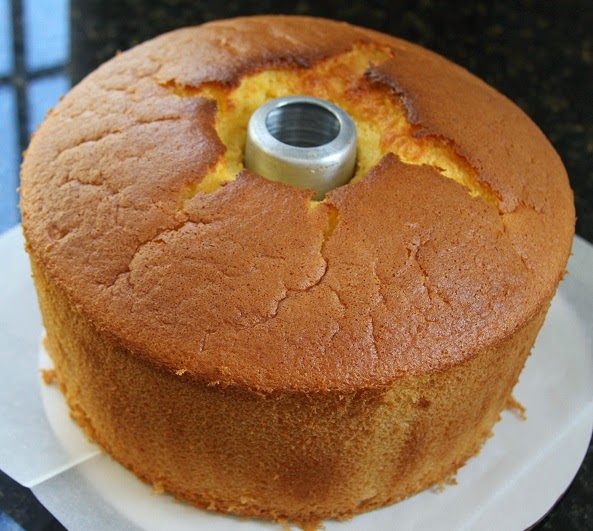
Chinese Style Chiffon Cake (鸡蛋糕)
Adapted from Chocolate and Zucchini
Recipe is for one large cake
195 grams cake flour
1/2 tsp baking powder
9 medium egg yolks (8 large or 7 extra large)
Large pinch of salt
1.5 teaspoons pure vanilla extract
165 grams granulated sugar
150ml (3/4 cup) water/juice/milk
120ml (1/2 cup) vegetable oil (any light flavored oil will work)
9 medium egg whites (8 large or 7 extra large)
Preheat the oven to 340°F and have a 10 inch not nonstick tube pan(angel food cake pan) ready, ungreased.
Sift the flour and baking powder together 3 times, set aside.
In a large bowl, combine the egg yolks, salt, vanilla extract, and about 50g of the sugar (reserve the rest for later). Whisk for several minutes, until it turns pale yellow and thick ribbons fall from the whisk. Mix in the oil and the water, and whisk well between each. Add in the flour mixture and whisk until well blended, but don't overmix.
In another large bowl with a clean whisk or in a stand mixer with a whisk attachment, beat the egg whites on medium speed until they start to foam. Add the remaining sugar and beat until stiff.
Whisk a third of the beaten egg whites into the batter and mix until blended. Fold in the rest of the egg whites gently but not timidly with a spatula until just blended. Be sure there are no large clumps of egg whites left as this will leave wet spots in the finished cake.
Pour the batter into the pan. Bake until set and golden brown, about 45-50 minutes or until a skewer comes out clean. As soon as it comes out of the oven, invert the pan onto a cooling rack so the cake won't collapse, let cool completely. To unmold, run a knife around the edge and remove the cake, run knife under the cake to remove the bottom. It's easier to remove if you slice through the cake but you can also just slip the center out or serve it on the pan.
 |
| Inverting the cake when I first started, I've since found a bottle that fits the center hole well so I've been using that. |
Rub 2 tsp grated lemon zest into the sugar with your fingers. Then use as directed. Add 1 tbsp lemon juice when beating the egg whites. Add 1 tsp of lemon extract to the egg yolks and reduce vanilla extract to 1 tsp.
For an Orange Chiffon Cake:
Use orange juice. Rub 2 tsp grated orange zest into the sugar with your fingers. Then use as directed. Add 1 tsp orange extract if you'd like. Reduce vanilla extract to 1 tsp.

For a Coconut Chiffon Cake:
Use coconut milk. Sift one 2 oz package of coconut milk powder with the dry ingredients. Add 1 tsp of coconut extract if desired. Reduce vanilla extract to 1 tsp.
 |
| coconut chiffon |
Friday, April 1, 2011
A Relatively Tall Cake
So, last week, i decided to bake this cake. I had been eyeing it for a while after seeing it here and bought myself a set of nice cake pans in order to make this cake. I have a set of inexpensive ones, but really wanted some better quality ones that would measure up to how delicious this cake looked.

However, seeing as how tall it was and knowing that my family would never be able to finish it, i reduced the recipe to a two layer 8" cake. (2/3 the recipe)Unfortunately, i forgot to take into account that less baking time would be needed, so this cake did not end up as moist as it could've been. It was still good nonetheless, with a very rich chocolatey flavor that wasn't overly sweet. I didn't make the raspberry filling, but decided to top it with raspberries for some color. It would also be good with just some raspberry jam spread between each layer.
Double Chocolate Layer Cake
Adapted from Epicurious via Love and Olive Oil
2 ounces good quality semisweet chocolate
1 cup hot brewed coffee
2 cups sugar
1 2/3 cups all purpose flour
1 cup unsweetened cocoa powder(not Dutch process)
1 1/3 tsp baking soda
1/2 tsp baking powder
5/6 tsp salt
2 eggs
1/2 cup vegetable oil
1 cup buttermilk
1 tsp vanilla extract
Unsalted butter, for greasing pans
Ganache Frosting: (halve this if layering with another filling)
3/4 pound good quality semisweet chocolate
3/4 cup heavy cream
1 1/2 tbsp sugar
1 1/2 tbsp light corn syrup
3 tbsp unsalted butter
Preheat oven to 300°F and grease two 8" cake pans. Line the bottoms with rounds of parchment paper and grease with butter.
Finely chop the chocolate and combine in a bowl with the coffee. Let mixture stand, stirring occasionally, until chocolate is melted and mixture is smooth.
Into a large bowl sift together the sugar, flour, cocoa powder, baking soda, baking powder, and salt. In another large bowl with an electric mixer beat eggs until thickened slightly and pale yellow, about 5 minutes. Slowly add oil, buttermilk, vanilla, and melted chocolate mixture to eggs, beating thoroughly after each addition. Add flour mixture and beat on medium speed until just combined.
Divide batter between pans and bake on the middle rack until a cake tester comes out clean, 45 minutes to an hour. Cool layers completely in pans on racks. Run a thin knife around edges of pans and invert onto the racks. Remove parchment paper and slice each cake into two layers. Cake layers may be made 1 day ahead and kept, wrapped well in plastic wrap, at room temperature.
To make frosting:
Finely chop the chocolate. In a saucepan bring cream, sugar, and corn syrup to a boil over moderately low heat, whisking until the sugar is dissolved. Remove pan from the heat and add chocolate, whisking until the chocolate is melted. Cut butter into pieces and add to frosting, whisking until smooth.
Transfer frosting to a bowl and cool, stirring occasionally, until spreadable. It's easiest to spread the frosting when it's warm as opposed to letting it cool too much.
Spread the frosting or another filling between the cake layers, assemble, and spread ganache over the top and sides. Cake keeps, covered and chilled, 3 days. Bring cake to room temperature before serving.
This is the second real cake i've ever made(out of the ones that i'm counting anyway) not including things like bundt cake, angel food cake, or pound cake. When i think of cake, it has to be something suitable for a birthday with layers and some type of frosting. The last real cake I made was this strawberry cake with a simple chiffon cake, strawberries, and whipped cream. Planning on making Christina Tosi's banana hazelnut cake when i have some more free time. You can find the recipe by searching online.

Friday, March 18, 2011
Follow my blog with Bloglovin
Hey there,
Follow this blog and other blogs over at bloglovin, really easy to keep track of your blogroll.
-Mel
Follow this blog and other blogs over at bloglovin, really easy to keep track of your blogroll.
-Mel
Wednesday, December 8, 2010
Joining the madness
I suppose i have gone somewhat mad in deciding to start this blog. I am by nature a softspoken and private person. In addition, i rarely share what i am thinking. However, i feel that there is some strange comfort in being able to share one's thoughts without having to admit to them(that is until someone stumbles upon this). I don't expect anyone to read this, rather this will likely serve as a place for me to empty my thoughts. So, it is with hope and apprehension that i begin this adventure. Though i have set this up to indicate that there will be future posts, i cannot say how often i will post or if there will even be another. I don't have a camera and have had few experiences with social media. If i do come across another night like tonight where sleep deprivation has led me down this path, you may see more of my thoughts, but until then, this overly dramatic introduction will have to do.
Update: 9/5/11
After many months and a few recipe posts, I am still trying to figure out where I would like this blog to go. While I enjoy blogs that combine many different facets of a person's life, I also want to keep this space relatively simple. I want to include only things that make me smile and things that I feel are worth sharing. However, this means that very few posts end up here. I love the creativity that I have gained with being a reader of so many other wonderful bloggers. I will continue to periodically update this blog and see where it goes, but definitely go check out some of my favorite blogs on my blogroll page. Do it! Do it now! Are you still here?
Subscribe to:
Posts (Atom)