Saturday, February 11, 2012

A Healthy Root Vegetable Cake(Better than it Sounds)


I first saw this cake in the video below and was immediately intrigued. Although at first, I was just curious as to how it would taste, I started to realize that beet cake would probably taste really good. The earthiness of beets pairs really well with the deep rich flavors of chocolate and if you didn't tell anyone, this could easily pass off as a light chocolate cake with veggie undertones.  Since I first found this recipe, I've come across many other recipes for beet cake. I decided to go with this one because it used less chocolate and more beets. I really wanted to taste the beets in this cake and didn't want to end up with a chocolate cake.


beet cake from tiger in a jar on Vimeo.

It came out great, it is just lightly sweet and chocolatey and the beets make it incredibly moist. I was surprised because the batter was quite thick and dense going into the oven, but it came out light and so soft and spongy that I had trouble picking it up without breaking. This is a great "everyday" type of cake that you could enjoy as a snack on its own and would also be great layered up with frosting for a more special occasion if you so desire.

Beet Cake
Recipe from Tiger in a Jar
Makes a 9 inch round single layer or an 8 by 8 inch square layer

2 cups beet puree
2 cups all purpose flour
3 large eggs
1 1/2 cups dark brown sugar
1 cup butter
4 oz semisweet chocolate, melted
1 tsp vanilla extract
1/4 tsp salt
2 tsp baking soda

Preheat oven to 375 degrees F. In a bowl, sift the flour, baking soda, and salt.

With a hand mixer or stand mixer, beat the butter with the sugar until smooth. Add the eggs, one at a time. Then, add the melted chocolate, the beet puree, and the vanilla. Slowly mix in the dry ingredients and beat for two more minutes. Pour batter into a parchment lined pan and bake for 45-50 minutes until a toothpick inserted comes out clean. Let cool before cutting. Dust with powdered sugar if desired.

What I've Been Looking For - The Baguette


It's taken me quite a few tries to finally find a baguette recipe that is pretty close to those you get at a bakery. Leave it to the bakers over at King Arthur to come up with a recipe for the best at home baguette I've tried thus far. It has the holes and chewiness I've been looking for along with the flavor that results from a long rise. Although the ingredients are extremely simple, what you end up with is complex in taste and well worth the effort. I've had this recipe bookmarked for several months and can't believe I've waited this long to try it out. This makes great toast, sandwich bread, and of course is amazing right out of the oven.

I recommend watching the videos on the site to learn how to shape your baguettes because they also offer some great tips on ensuring you get the best end product. After a few times, I still haven't really gotten the hang of shaping baguettes yet. However, no matter how it looks, it will still taste amazing if properly risen. Compared to my other bread recipes, this dough is much softer and stickier. The higher moisture content actually contributes to creating those holes you want, so don't be tempted to add too much flour to this dough if it feels sticky. Just sprinkle a light dusting of flour on the outside and it should be easy enough to handle.

Sprinkled with parmesan before baking
If you've been looking for an at home baguette that rivals most bakeries, give this a try. It's actually much easier than you might think. The process is long, but it's mostly just time spent waiting for it to rise. I'm also excited to try the stuffed version next time.

Classic Baguette
Recipe from King Arthur Flour
Makes 3 medium baguettes or 2 larger ones

Starter - Make the night before
1/2 cup cool water
1 cup bread flour
1/16 tsp active dry yeast

Mix the water with the yeast and let sit for about 5 minutes to activate. Then mix in the flour forming a soft dough. Cover with plastic wrap and let it sit in a warm place overnight.

Dough
All the starter
1-1 1/4 cups warm water
1 tsp dry active yeast
3 - 3 1/2 cups bread flour
1 1/2 tsp salt

In the bowl of a stand mixer with a dough hook, mix the warm water with the yeast and let sit for a few minutes to activate. Add all the starter and mix on medium for a minute or so to incorporate the starter. Add the flour gradually and mix on medium low speed until it comes together. Add the salt, then mix for another 5-10 minutes so that the dough is properly kneaded.

Place the dough in a lightly oiled bowl, covered with plastic wrap, and let rise for three hours in a warm place, turning it gently every hour.

After three hours, lightly punch down the dough to eliminate any large gas bubbles, then divide the dough and preshape into a flat oval-like shape. Let rest for 15 minutes. Shape your dough into baguettes by folding the oval lengthwise, sealing the fold with the palm of your hand, then repeating the process, and rolling it out a bit into a log.

Let your baguettes rise another 1 1/2 hours covered with a cloth or oiled plastic wrap. Towards the end of the rising time, preheat your oven to 425-450 degrees F. Slash your loaves and bake for 20-30 minutes until golden brown and hollow sounding.

You can spritz with water for a crunchier crust, but I like the texture without spritzing. The baguettes keep well for a few days or freeze them and reheat when needed.
After the 3 hour rise

Sunday, January 29, 2012

Chiffon Cake II


I don't really know how to start other than ...

Here's another chiffon cake you should add to your repertoire. Like the other basic chiffon cake(Chinese Style Chiffon Cake)  posted on this blog, this recipe can be adapted to make many different variations by simply adding different extracts and juices/liquids. Although the taste of the basic recipe is essentially the same, the addition of cream of tartar as opposed to all baking powder gives the cake a moister, spongier texture. Try it and you'll know what I mean. There is also a higher proportion of eggs to flour and water. I don't think one is better than the other, it's just a matter of preference.

This cake is a bit more complicated than the other one if you want to follow the specific ratio of eggs to flour, but not much more. My aunt weighs her eggs with the shell, then using a ratio of 18 oz eggs to 5.4 oz flour, she determines how much flour to use. It's not much more work to do this, especially since you'll be weighing other ingredients as well. However, if you don't want to go to the trouble of doing this extra step, the cake should still turn out fine using a specific number of eggs and a given amount of flour. Based on the couple of times I've made this, the average weight of 8 large eggs is about 17 oz, so that means on average, you should use 5.1 oz cake flour.

I will continue to make both this as well as my other chiffon cake depending on my mood and what I have in the pantry. I really like that both of these recipes have specific weight measurements because I do find that it ensures more consistent results. The recipe below is a version with lemon extract and orange juice, but you can easily switch these out for something else.

Chiffon Cake II
Recipe Adapted from my Auntie Thelma

8 large eggs, separated(9 medium or 7 extra large eggs)
5.1 oz(145 grams) of cake flour(or determined based on 18 oz eggs/5.4 oz flour ratio)
160 grams granulated sugar(5.6 ounces)
1 tsp pure vanilla extract
1/2 tsp pure lemon extract
1/4 tsp baking powder
1/2 tsp cream of tartar
large pinch of salt
3/8 cup vegetable oil
1/2 cup orange juice

Preheat oven to 340 degrees Fahrenheit. Weigh out your ingredients. Sift the flour and baking powder three times.

To the egg yolks, add more than half of the sugar and whisk for 1-2 minutes with a large whisk until it is pale and ribbons fall from the whisk. Add in the extracts and salt. Add the oil, then the juice, whisking thoroughly after each addition. Mix in the sifted flour and baking powder until just combined.

Add the cream of tartar to the egg whites and mix in a stand mixer with the whisk attachment on high speed until frothy. Then slowly add in the remaining sugar and whip until stiff, but not dry peaks.

To the egg yolk mixture, mix in a third of the egg whites to lighten the mixture. Then, fold in the remaining egg whites, being careful not to deflate the egg whites.

Pour into a 10 inch tube pan and bake for 45 mins or until a skewer inserted comes out clean. Invert and let cool completely before removing from pan.

Sunday, January 1, 2012

Berry Chiffon Cake

I set out to make a pink cake and this is what happened. My little cousin's favorite color is pink, so I thought it only appropriate to make her a cake that matched her love of the color. She's six, so there aren't very many things she's passionate about yet, though the color pink is one of them. Unfortunately, it's not so easy to make a pink cake without the use of food coloring, especially with the addition of raspberry puree, so what resulted was a greyish pink cake. It was intended to be a strawberry cake, but I just couldn't find good strawberries at this time of year. So, I made it into a raspberry cake with a strawberry raspberry chiffon cake as the base. I filled the cake with a raspberry mascarpone cream filling and frosted it with whipped cream.
The cake overall tasted pretty good, but with fresh puree, the cake would have been much better in flavor and texture. I pureed frozen berries, so the resulting cake was not as moist as it could have been. However, in late fall, it's good to know that you can still make a nice berry flavored cake with frozen berries.

I'm still on the hunt for simple not-nonstick aluminium baking pans that are good quality but at a reasonable price so that I can start baking chiffon layer cakes without using a tube pan. They are actually surprisingly hard to find since nonstick has become the norm in bakeware. I think the cakes baked in such pans might not be as light as cakes baked in a tube pan, but a cake with a hole in the middle doesn't look all that great and is harder to decorate. A cake the size of a 10 inch tube pan is also too big for my family, so another alternative might be to get a smaller tube pan.

I'll just share the berry chiffon cake recipe here because the whipped cream frosting is already on this blog and the filling is just something I mixed up to my taste. I combined raspberry puree with powdered sugar and mascarpone cheese lightened with whipped cream.

Berry Chiffon Cake
Adapted from BakingBites.com

2 1/4 cups sifted cake flour
1 1/2 cups sugar
1 tbsp baking powder
large pinch of salt
3/4 cup fresh berry puree(I used frozen strawberries and raspberries)
1/4 cup + 3 tbsp vegetable oil
1 1/2 tsp vanilla extract
7 large eggs, separated, room temp
food coloring(optional)

Preheat the oven to 325 degrees F. Add 8-10 drops of red food coloring to the berry puree or a small amount of gel food coloring if using.

In a bowl, sift together the flour, 1 1/4 cups sugar, salt, and baking powder. In another bowl, whisk together the berry puree, vegetable oil, vanilla, and egg yolks. Mix the berry mixture into the dry ingredients and whisk until well combined.

In a stand mixer, whisk the egg whites on medium high speed until foamy, then gradually add in the remaining 1/4 cup sugar. Continue whisking until stiff peaks. Take a third of the whipped egg whites and whisk vigorously into the berry-egg yolk base to lighten. Gently fold in the remaining egg whites with a spatula until fully incorporated.

Pour the batter into a 10 inch tube pan and bake for 50-60 minutes until an inserted toothpick comes out clean. Invert and let cool completely before unmolding.

A Sweet Sourdough - Part 2

Since the last post on a honey wheat bread made with sourdough starter, I've been looking for other honey wheat bread recipes made with sourdough starter. While the last one is a great honey wheat option for both sweet and savory applications, personally I prefer a honey wheat bread that is much more sweet with a stronger wheat flavor. Since I couldn't really find any recipes that fit what I was looking for, I decided to come up with my own.


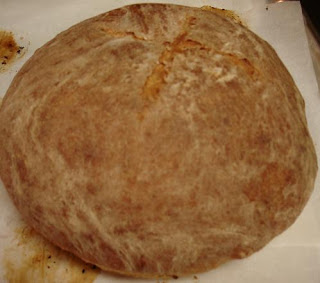
I was pretty happy with the outcome. It's sweet, but not overly so and has the stronger wheat flavor I want in a wheat bread. It's good if you have a starter that you need to use. If not, just make honey wheat bread without sourdough starter. Although this will probably be my go to honey wheat bread recipe for now, I don't think I'll ever stop trying out new recipes. Molasses, cocoa powder, and coffee are some of the many add ins and swap outs that would be great in this recipe.


Sweet Honey Wheat Sourdough Bread
Daydreamel Original
Makes one small loaf

1 1/2 tsp dry active yeast
1/2 cup warm milk/water
1/3 cup honey
2/3 cup liquid sourdough starter
1/2 tsp fine salt
1 cup whole wheat flour
1 3/4 cups bread flour

Mix the yeast and the milk in the bowl of a stand mixer with a dough hook. Let sit for 2 minutes. Add the starter and the honey. On low speed, mix in the whole wheat flour, then the salt, and finally the bread flour until well combined. Knead for 8-10 minutes adding more flour as necessary.

Place in an oiled bowl, cover with plastic wrap, and let rise in a warm place for 1 1/2 hours until doubled in size. Punch down the dough and shape into a loaf.

Place on a parchment lined baking sheet and let rise for another 1 1/2 hours until doubled in size.

Preheat the oven to 375 degrees F and bake for 35 minutes until it sounds hollow. Let cool for 5 minutes before slicing.

Thursday, December 15, 2011

Red Velvet Cheesecake


I'm not a huge fan of red velvet cake nor cheesecake even though cheesecake is the dessert I have probably made the most simply because other people(I'm talking about you mommy) request it. I don't like the idea of eating a lot of food coloring and I'm just more excited by cakes and tarts than cheesecake. However, my sister is a fan of both red velvet cake and cheesecake(new york style to be exact). So, when she saw this red velvet cheesecake on my list of recipes to try a few months ago, she promptly requested that I make it for her.

I finally did so this Thanksgiving and I have to say the end result was a success. The red velvet was so good that I'd be willing to make it again and again as cupcakes and layer cakes, even with the food coloring. It had just the right amount of chocolateyness, if there is such a word, but was definitely a red velvet cake and not a chocolate cake. Unfortunately, I didn't have any gel food coloring, so my cake didn't turn out as vibrant as I would have liked. The cheesecake was also really good and came together with the cake quite nicely. Next time, I might put a thin layer of cream cheese frosting between the cheesecake and red velvet cake just so it doesn't separate when cut. However, it looks like Elissa's cake didn't have that problem, so it all depends on the moistness of your cheesecake.

I adapted the recipe to make an 8" cake. I kept the recipe for the cake the same and just baked in smaller cake pans, but reduced the size of the cheesecake because I wanted a higher ratio of cake to cheesecake than the original recipe. I baked my cheesecake in a cake pan lined with parchment rather than a springform pan to ensure that it would be as close to the size of the cake layers as possible.

Red Velvet Cheesecake
Makes an 8" cake
Adapted from 17 and Baking/Saveur/Martha Stewart

Cheesecake - Make the day before you plan to assemble the cake
16 oz cream cheese, room temp
1/2 cup granulated sugar
1 1/2 tsp milk
pinch of salt
2 large eggs, room temp
1/3 cup sour cream, room temp
3/4 tbsp all purpose flour

Preheat your oven to 325 degrees F and boil a kettle of water. In a food processor or a mixer, beat the cream cheese until softened. Add the sugar and blend thoroughly until smooth. Mix in the eggs one at a time until just incorporated. Add the salt, milk, and sour cream. Finally, add the flour. Pour into a greased and parchment lined 8 inch cake pan, place in a hot water bath, and bake for about 30-40 minutes until the center is just set. Let cool until warm to the touch. Press plastic wrap onto the surface of the cheesecake and refrigerate overnight. Unmold the next day.

Red Velvet Cake
2 1/2 cups cake flour
1 1/2 cups sugar
1 tsp baking soda
1 tbsp cocoa powder
1/2 tsp fine salt
2 large eggs, room temp
1 1/2 cups vegetable oil
1 cup buttermilk, room temp
1 tsp vanilla extract
1 tsp white vinegar
red gel food coloring, as desired

Grease and line two 8 inch cake pans with parchment paper. Preheat the oven to 350 degrees F. Sift the flour, baking soda, sugar, and cocoa powder into a bowl. In a mixer on medium speed, beat the eggs, buttermilk, oil, vanilla, and vinegar until well combined. Add the dry ingredients and mix on medium low speed until just combined. Mix in as much food coloring as desired. Evenly distribute the batter between the two cake pans and bake for 25-30 minutes, rotating halfway, until a toothpick inserted in the center comes out clean. Let the cake layers cool for five minutes, then invert and cool completely on a cooling rack. Level off the layers with a serrated knife if necessary.

Next, make the frosting.

Cream Cheese Frosting
10 oz cream cheese, room temp
5 tbsp unsalted butter, room temp
1 tsp vanilla extract
2 1/2 cups powdered sugar(sifted, then measured)

With a mixer, beat the cream cheese and butter until smooth. Mix in the vanilla extract. Add the powdered sugar gradually until it is all incorporated.

To assemble:
Remove the parchment from one of the cake layers and place the cake layer on a serving dish or turntable bottom side down. Flip the layer of cheesecake onto the cake, then remove the parchment. Flip the remaining layer of cake onto the cheesecake and remove the parchment. Trim the sides of the cheesecake so that it is the same size as the cake, if necessary. Crumb coat the cake by spreading a thin coat of frosting over the entire cake. Refrigerate for 30 minutes. Frost the rest of the cake with the remaining frosting. Decorate as desired and refrigerate until serving. The cake can be made ahead and will last several days in the fridge.